The Ultimate Chocolate Cottage Cheese Cheesecake (High-Protein!)
Are you craving a thick, rich slice of chocolate cheesecake, but instantly dreading the sugar crash and heavy macros that come with it? You are definitely not alone.
Most of us coffee lovers enjoy a sweet treat alongside our afternoon pour-over, but finding a dessert that actually fuels your body instead of putting you to sleep is incredibly tough. You’ve probably seen the viral cottage cheese trends taking over TikTok and Instagram, and maybe you’ve thought: “There’s no way that actually tastes like cheesecake.”
Well, I am here to tell you — it does, if you do it right. This chocolate cottage cheese cheesecake is the ultimate hack for dessert lovers. It’s packed with protein, shockingly rich, and pairs absolutely beautifully with a dark roast coffee. Let me show you exactly how to make it perfectly smooth, completely bypassing that dreaded “grainy” texture. Let’s dive in! 👇
💡 My Experience: When I first tried baking with cottage cheese three years ago, my results were… well, grainy and honestly pretty weird. But after testing 5 different brands and tweaking blending times, I finally cracked the code. I found that using a high-fat cottage cheese (like Good Culture 4%) and blending it in a Vitamix for exactly 60 seconds transforms it into a silky, mascarpone-like texture. In this guide, I’m sharing the exact ratios and techniques that saved my afternoon coffee rituals — and they’ll save yours too!
What is a Chocolate Cottage Cheese Cheesecake?
A chocolate cottage cheese cheesecake is a high-protein, macro-friendly dessert that replaces traditional cream cheese with blended cottage cheese.
By puréeing the cottage cheese until completely smooth and mixing it with cocoa powder, a sweetener of your choice, and eggs, you create a batter that bakes into a dense, fudgy, and ultra-creamy cake. It delivers the exact same mouthfeel as a classic New York-style cheesecake — but with a fraction of the fat and up to triple the protein content.
A chocolate cottage cheese cheesecake is a high-protein dessert made by blending full-fat cottage cheese until smooth and combining it with cocoa powder, eggs, and sweetener. It is baked in a springform pan and chilled until set, resulting in a creamy, macro-friendly alternative to traditional cheesecake.
Why This Recipe Actually Works (And Matters)
If you are a regular here at CoffeeOutsiders, you know we don’t just eat treats — we curate experiences. 🍵
Here is why this recipe is going into your permanent rotation:
- The Macro Miracle: A standard slice of chocolate cheesecake has about 500 calories and just 5g of protein. This version sits at roughly 180 calories and delivers a massive 14g of protein per slice. That’s a complete transformation.
- The Tangy Balance: Cottage cheese has a natural, subtle tanginess that perfectly mimics the slight sourness of real cream cheese — so the flavor profile is surprisingly authentic.
- Satiety Power: The casein protein in cottage cheese digests slowly, meaning this dessert keeps you genuinely full for hours. No 3 PM crash. Just energy. ✅
- Clean Ingredients: No heavy cream, no refined flour, no artificial anything (if you pick the right sweetener).
- Budget-Friendly: A tub of Good Culture cottage cheese costs a fraction of what quality cream cheese costs, especially at bulk stores.
⚡ Quick Tip: This recipe works for fitness enthusiasts, macro-trackers, people on a lower-calorie diet, AND people who simply want to eat less processed food — without giving up dessert.
What You’ll Need: Ingredients & Tools
Precision is everything here. To get that café-worthy, restaurant-quality dessert, you need exactly the right components. No shortcuts! 🙅♂️
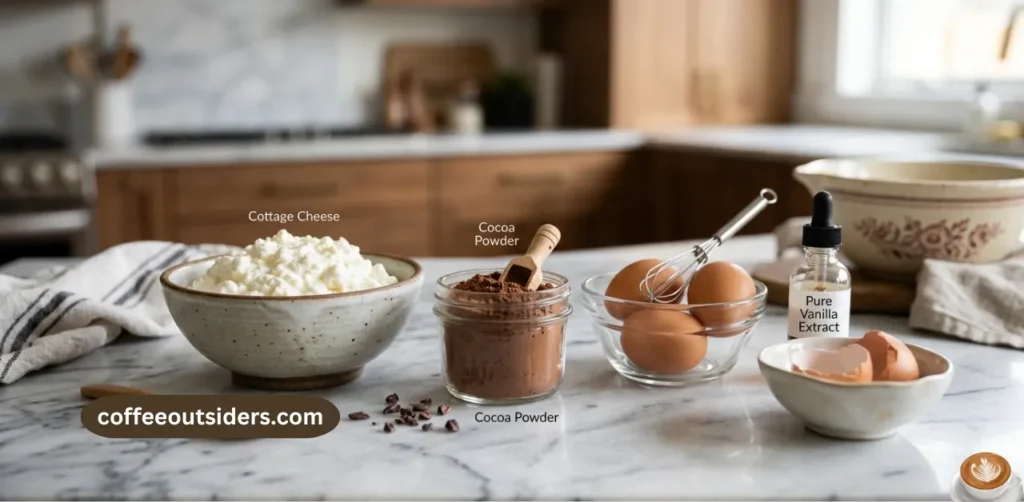
The Ingredients (Makes one 8-inch cheesecake — 8 slices)
| Ingredient | Amount | Notes |
|---|---|---|
| Full-Fat Cottage Cheese | 24 oz (3 cups) | Good Culture 4% Whole Milk Classic is strongly recommended |
| Dutch-Processed Cocoa Powder | ½ cup | Less acidic, richer, deeper chocolate flavor than standard cocoa |
| Sweetener of Choice | ½ cup | Monk fruit/Erythritol blend (low-carb), maple syrup, or cane sugar |
| Large Eggs | 2 (room temp) | Room temperature is non-negotiable — it prevents lumps |
| Pure Vanilla Extract | 1 tsp | Enhances and deepens the chocolate notes |
| Cornstarch (or Arrowroot) | 1 tbsp | Absorbs excess moisture, prevents cracking and a soggy center |
| Fine Sea Salt | ¼ tsp | Balances sweetness and sharpens the chocolate flavor |
The Tools
- ✅ High-Speed Blender (Vitamix or Ninja — this is non-negotiable)
- ✅ 6-inch or 8-inch Springform Pan
- ✅ Parchment Paper
- ✅ Large Mixing Bowl
- ✅ Silicone Spatula (for gentle folding)
- ✅ Oven-safe roasting pan (optional — for water bath)
💡 Pro Tip: Do NOT use a stick/immersion blender or a regular food processor if you can avoid it. They are not powerful enough to fully break down cottage cheese curds. A stand blender like a Vitamix is the single biggest factor in achieving a silky texture.
How to Make Chocolate Cottage Cheese Cheesecake (Step-by-Step)
Let’s get baking! ☕ Follow these steps exactly and you’ll have perfect results every single time.
Step 1: Prep Your Oven and Pan
Preheat your oven to 350°F (175°C). Line the bottom AND sides of your springform pan with parchment paper.
⚡ Quick Tip: Crumple your parchment paper into a ball first, then flatten it out. It becomes soft and flexible and fits the curved edges of the pan perfectly — no tearing!
Step 2: The Crucial Blend (60-Second Rule)
Add your cottage cheese, sweetener, vanilla extract, and a pinch of salt into your high-speed blender. Blend on medium-high for exactly 60-90 seconds. Stop and scrape down the sides at the 30-second mark.
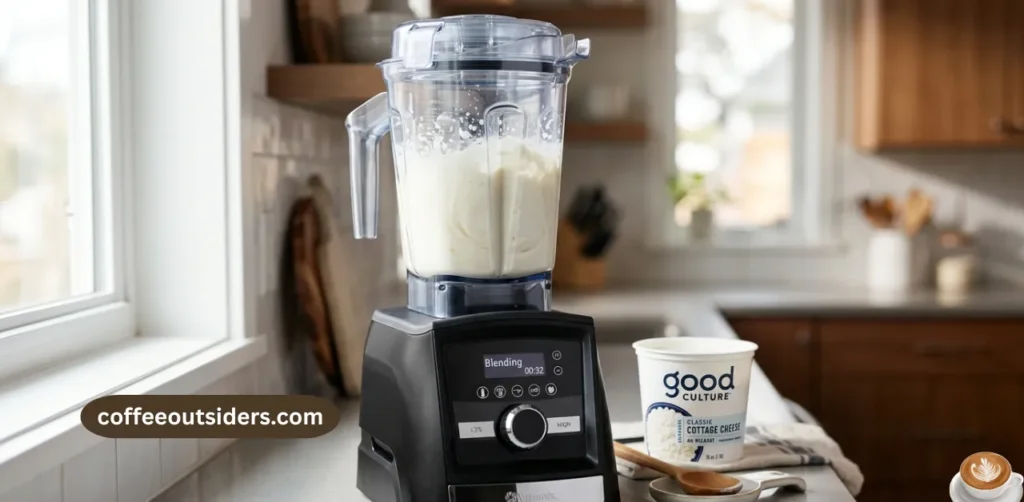
The final consistency should look exactly like melted vanilla ice cream — absolutely zero lumps, zero graininess. If you can still see any white curds, blend for another 20 seconds.
Step 3: Add Dry Ingredients
Pour your smooth, blended cottage cheese mixture into a large mixing bowl. Sift in your Dutch-processed cocoa powder and cornstarch — sifting is important to prevent dry clumps.
Whisk everything together gently until fully and evenly combined. The batter should be deep brown and look like rich chocolate mousse at this point. 😍
Step 4: Incorporate the Eggs (Gently!)
Add your room-temperature eggs one at a time, folding each one in carefully with a silicone spatula.
⚠️ IMPORTANT: Do NOT use a whisk here and do NOT overmix. Overmixing at this stage beats air into the batter. That air expands during baking, causes the cheesecake to puff up, and then when it cools, it collapses and cracks. Gentle folding = a perfect, crack-free surface.
Step 5: Pour & Tap
Pour your completed batter into the lined springform pan. Use your spatula to smooth the top into an even, level surface. Then, tap the pan firmly on the countertop 4-5 times to pop any hidden air bubbles trapped in the batter.
Step 6: Bake
Place the pan in the center of your preheated oven. Bake at 350°F (175°C) for 35-40 minutes.
How do you know it’s done? The edges should look completely set and firm, while the very center (about a 2-inch circle in the middle) should still have a gentle jiggle when you carefully shake the pan — like set Jell-O, not liquid. It will firm up completely during cooling.
Step 7: The Slow Cool (Do NOT Rush This!)
This step is the most overlooked — and it makes or breaks your cheesecake.
- Turn the oven OFF. Do not remove the cheesecake yet.
- Crack the oven door open by about 2 inches (use a wooden spoon to prop it).
- Leave the cheesecake inside the warm oven for 30 minutes — this gradual temperature drop prevents the top from cracking.
- Remove the cheesecake and let it cool fully on your countertop (about 1 hour).
- Once at room temperature, cover loosely with plastic wrap and refrigerate for a minimum of 4 hours. Overnight is strongly preferred.
💡 Pro Tip: I know it’s incredibly hard to wait, but this cheesecake genuinely tastes 3 times better on Day 2. The chocolate flavor deepens, the texture becomes more fudgy and dense, and the sweetness balances out perfectly. I always make mine the night before I plan to serve it.
Texture Troubleshooting: Banish the Grain Forever
This section is what most recipe blogs completely skip — and it’s why most people’s first attempt turns out grainy and disappointing. Let’s fix that permanently. 💪
The 5 Causes of Grainy Cottage Cheese Cheesecake (And Their Solutions)
Problem 1: Wrong Cottage Cheese Brand Not all cottage cheese is created equal. Brands with larger curd sizes (like some store-brand or low-fat options) are harder to break down completely. ✅ Solution: Use Good Culture 4% Whole Milk or Daisy Brand full-fat cottage cheese. These have smaller, more uniform curds and higher fat content which blends into pure silk.
Problem 2: Cold Cottage Cheese Cold dairy products don’t blend as smoothly because the fat molecules are solidified. ✅ Solution: Take your cottage cheese out of the refrigerator 20-25 minutes before blending. Room temperature cottage cheese blends at least 40% smoother.
Problem 3: Under-Blending Most people stop blending too early because it “looks smooth” at 20 seconds. Those micro-curds are still there — you just can’t see them yet. ✅ Solution: Blend for the full 60-90 seconds on medium-high. Set a timer. Don’t guess.
Problem 4: Low-Fat or Fat-Free Cottage Cheese Low-fat varieties have too much water content and not enough fat to create a creamy, rich texture. ✅ Solution: Always use 4% milkfat or higher. The fat is your friend in this recipe — it’s what creates that authentic, creamy cheesecake texture.
Problem 5: Weak Blender A regular kitchen blender or immersion blender simply doesn’t have the power to break down protein curds completely. ✅ Solution: Use a Vitamix, Ninja Professional, or equivalent high-speed blender (at least 1,000 watts). This is the single most impactful equipment upgrade you can make for this recipe.
⚡ Quick Tip — The Water Bath Method (Optional but Recommended): For an extra-smooth, crack-free result, place your springform pan inside a larger oven-safe roasting pan. Fill the roasting pan with 1 inch of hot water before sliding everything into the oven. The steam created keeps the cheesecake’s surface moist throughout baking, preventing cracks and creating an ultra-silky texture.
Tips & Tricks From My Testing Kitchen
After 3 years of testing and dozens of batches, here are my most valuable, hard-won insights:
- Sift your cocoa powder. Always. Un-sifted cocoa clumps badly and leaves bitter, dark spots throughout the cheesecake.
- Add 1 tablespoon of instant espresso powder to the batter along with your cocoa powder. This is the single best flavor upgrade you can make. It amplifies the chocolate flavor by at least 50% and adds beautiful coffee depth. ☕
- Use pure vanilla extract, not imitation. The difference in flavor, especially in a simple recipe like this, is very noticeable.
- Check for doneness at the 30-minute mark, not 40. Every oven runs differently. The jiggle test is your most reliable indicator — don’t rely solely on the timer.
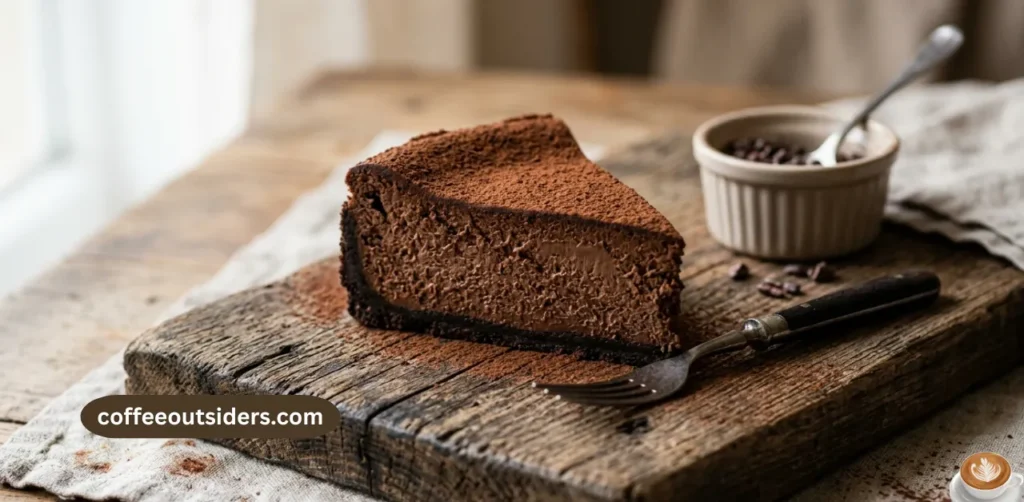
- Top it correctly: Once fully chilled, dust the top with an extra layer of cocoa powder through a fine mesh sieve right before serving. Add a single dark chocolate square on top. It transforms the presentation instantly.
Common Mistakes to Avoid
These are the mistakes I see most often — avoid every single one and your results will be flawless:
❌ Using low-fat or non-fat cottage cheese — The water content is too high. Your cheesecake will be soft, wet, and won’t set properly.
❌ Skipping the cornstarch — Cornstarch absorbs excess liquid. Without it, you risk a soggy, sunken center.
❌ Using cold eggs — Cold eggs will seize the batter and create lumps. Always room temperature.
❌ Overbaking — If the center doesn’t jiggle AT ALL when you remove it from the oven, it’s overbaked. It will be dry and crumbly. Aim for that gentle center jiggle every time.
❌ Cutting it before it’s fully chilled — Cutting a warm cheesecake is a disaster. The texture hasn’t fully set and your slices will fall apart. Refrigerate for a minimum of 4 hours — no exceptions.
❌ Using Dutch-process and natural cocoa interchangeably — Dutch-processed cocoa has been treated with alkaline to neutralize acidity, giving it a darker color and smoother flavor. Standard natural cocoa will give you a bitter, acidic result. Always use Dutch-processed for this recipe.
Variations & Dietary Alternatives
One of the best things about this recipe is how easily it adapts. Here are my tested, go-to variations:
Keto / Low-Carb Version
Swap standard sweetener for a Monk Fruit/Erythritol blend (like Lakanto brand) and skip the crust entirely. Carbs drop to approximately 4-6g net per slice.
Mocha Cottage Cheese Cheesecake ☕
Add 1 tablespoon of instant espresso powder directly into the batter alongside the cocoa. This deepens the chocolate flavor dramatically and creates a beautiful mocha profile. Absolutely incredible paired with a Nitro Cold Brew.
Mint Chocolate Version
Add ½ teaspoon of pure peppermint extract to the batter. Top the finished, chilled cheesecake with a dark chocolate ganache and crushed candy cane. Perfect for the holidays. 🎄
High-Protein Chocolate Crust (No Graham Crackers)
Mix 1 cup almond flour + 2 tablespoons melted coconut oil + 1 tablespoon cocoa powder + a pinch of salt. Press firmly into the base of your springform pan and bake for 10 minutes at 350°F before adding the filling. This adds texture, crunch, and approximately 5g extra protein per slice.
Dairy-Free / Vegan Adaptation
Use a vegan cottage cheese alternative (Kite Hill makes an excellent one) and replace eggs with 2 tablespoons of cornstarch + 3 tablespoons of water (a cornstarch egg substitute). The texture will be slightly softer but still delicious.
Standard vs. Cottage Cheese Cheesecake: The Comparison
Let’s look at the numbers side by side so you can see exactly what you’re getting:
| Feature | Standard Chocolate Cheesecake | Cottage Cheese Cheesecake |
|---|---|---|
| Primary Base | Cream Cheese + Heavy Cream | 4% Milkfat Cottage Cheese |
| Calories per slice | ~450 – 550 | ~180 – 220 |
| Protein per slice | ~5g | ~14g |
| Total Fat | ~35g | ~8g |
| Saturated Fat | ~20g | ~4g |
| Texture | Ultra-dense, heavy, very rich | Creamy, smooth, slightly lighter |
| Prep Complexity | Medium-High | Easy |
| Cost to Make | Higher | Budget-Friendly |
| Macro-Friendly? | ❌ No | ✅ Yes |
The numbers speak for themselves. And the flavor? Genuinely, almost identical — if you follow the blending techniques above.
The Ultimate Coffee Pairings Guide ☕🍫
Here at CoffeeOutsiders, we take pairings seriously — and chocolate and coffee share hundreds of the exact same flavor compounds (seriously, there’s science behind this). Here are my three tested, perfected pairings for this cheesecake:
Pairing 1: Natural-Process Ethiopian Light Roast (Pour-Over)
The fruity, berry-jam, and wine-like notes of a natural-process Ethiopian coffee cut through the dense richness of the chocolate cheesecake like a knife through silk. The contrast is extraordinary — the acidity of the coffee resets your palate between bites, making each bite taste like the first.
Understanding Coffee Roast Profiles — Light vs. Dark
Recommended Brew: Hario V60 or Kalita Wave, 93°C water, 1:15 coffee to water ratio.
Pairing 2: Italian Dark Roast Espresso (Double Shot)
This is the classic, timeless pairing for a reason. The natural bitterness of a well-pulled espresso shot and its thick, caramel crema perfectly balance the sweetness of the cheesecake. If you used monk fruit sweetener (which can have a very faint cooling aftertaste), the espresso eliminates it completely.
Recommended Brew: 18g in, 36g out, 28-30 second pull, 93°C. Use a medium-dark Italian or Brazilian blend.
Pairing 3: Nitro Cold Brew (For Hot Days) 🧊
The thick, creamy mouthfeel of a Nitrogen-infused cold brew mirrors the silky texture of the cottage cheese cheesecake, creating a unified, cohesive tasting experience. The natural sweetness of the cold brew (cold water extraction produces less bitter coffee) is a natural match for dark chocolate. This is my personal favorite warm-weather pairing.
💡 Pro Tip — The Mocha Shortcut: If you don’t have time to brew a separate coffee, just stir 1 tablespoon of instant espresso powder INTO your cheesecake batter. You’ll get that coffee-chocolate pairing built directly into every single slice. No extra brewing required!
Final Thoughts
Who knew that a tub of humble cottage cheese could transform into a genuinely café-worthy, decadent dessert? 😄
This chocolate cottage cheese cheesecake is living proof that you absolutely do not have to choose between your health goals and a rich, satisfying, deeply chocolatey dessert experience. The secret? Full-fat cottage cheese, a powerful blender, Dutch-processed cocoa, and the patience to let it chill properly overnight.
And the best part? Paired with a perfectly pulled espresso or a glass of Nitro Cold Brew, it becomes a complete sensory experience — the kind of afternoon moment that CoffeeOutsiders was built around. ☕
Now it’s your turn! Try this recipe this weekend and tell us how it turned out. Did you try the mocha variation? Did you add a crust? Did you pair it with Ethiopian light roast? Drop your experience in the comments below — we read and respond to every single one. And if you loved it, share this post with a fellow coffee and dessert lover who could use a healthy upgrade to their sweet tooth. 💚
Happy brewing — and baking! ☕🍫 — The CoffeeOutsiders Team

Zaibi
Zaibi blends compelling storytelling with strong digital expertise at Coffee Outsiders. With a background in SEO and content strategy, he ensures articles about coffee beans, brewing, tea, and drinks are both engaging and easy to discover online.
Frequently Asked Questions (FAQ)
No, you cannot taste the cottage cheese at all. Once blended smooth and combined with Dutch-processed cocoa powder, vanilla extract, and sweetener, the natural tanginess of the cottage cheese perfectly mimics traditional cream cheese. Most people cannot distinguish it from a standard cheesecake in a blind taste test.
This recipe is a baked cheesecake. However, it can be adapted into a no-bake version by omitting the eggs and cornstarch, and instead adding 1 tablespoon of unflavored gelatin dissolved in 3 tablespoons of warm water. Chill the no-bake version for a minimum of 6 hours to set properly.
Stored in an airtight container or covered tightly with plastic wrap, your cheesecake will stay fresh in the refrigerator for up to 5 days. The texture often improves and becomes more fudgy and dense on days 2 and 3 as the flavors meld together.
Yes, absolutely. Wrap individual slices tightly in plastic wrap, then place them in a freezer-safe zip-lock bag. They can be frozen for up to 2 months. To thaw, move a slice to the refrigerator the night before and let it defrost slowly overnight. Do not microwave to thaw — it will alter the texture.
Cracks are caused by two main factors: overmixing the eggs (which incorporates too much air, causing the batter to puff and then collapse) or baking at too high a temperature. Always fold eggs in gently with a spatula, use room-temperature eggs, and consider the water bath method for a perfectly smooth, crack-free surface.
Good Culture 4% Whole Milk Classic is the top recommendation based on testing. It has small, uniform curds and high fat content that blends into a perfectly smooth, silky texture. Daisy Brand Full Fat is an excellent and widely available alternative.
Yes. Replace each egg with a cornstarch egg substitute (1 tablespoon cornstarch + 1.5 tablespoons water per egg). The texture will be slightly softer and less “set” than the egg version, but it will still be delicious and much more structurally stable than a gelatin-based no-bake version.
Based on the recipe using Good Culture 4% cottage cheese and a Monk Fruit/Erythritol sweetener (divided into 8 slices), each slice contains approximately 180-220 calories and 14g of protein. Macros will vary slightly based on your specific sweetener and whether you add a crust.